[vc_row][vc_column][vc_column_text]
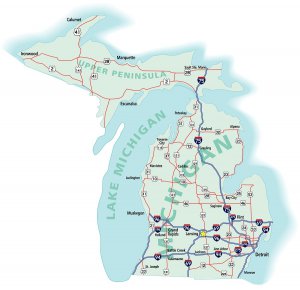
I’m getting ready to leave for our cabin in Michigan’s Upper Peninsula soon and I need an updated first aid kit. I looked at done-for-you commercially first aid kits, but couldn’t find one that met my needs. So I decided the best solution for me was to learn how to make a first aid kit and customize it for my specific needs.
I wanted to include some herbal and natural remedies but still be prepared for any emergency that may come up. Accidents can happen at any time… Someone may trip and sprain their ankle or wake up in the middle of the night with a bad headache. My grandson and niece will be with us this year, so I need items for cuts, scrapes, sprains, burns specifically.
[/vc_column_text][/vc_column][/vc_row][vc_row][vc_column][vc_column_text]
What Are Your Needs for a First Aid Kit?
What you put into your first aid kit depends on what your specific needs are. Will you have little ones with you? Do you experience insomnia when you travel? Constipation? Experience anxiety? What kind of bugs are waiting for you at your destination? Are you headed to a sunny, hot location? This is how you’ll decide what goes in your custom first aid kit.
The following are the things I used to make my custom natural first-aid kid. I hope it gives you ideas for creating your own. I’ve provided links for many of the products I’ve chosen to use in my kit because they fit my high standards for pure and organic ethically-sourced ingredients.
[/vc_column_text][/vc_column][/vc_row][vc_row][vc_column][vc_column_text]
How to Make a First Aid Kit
1. Get a First Aid-Ready Reference
 First things first. Go to the American Red Cross and download their free First Aid/CPR/AED manual or their Basic First Aid manual. Or get their free app to keep on your phone or tablet. It has step-by-step instructions to connect directly to your local emergency service and has free resources on everything from CPR to broken bones and heart attacks.
[/vc_column_text][/vc_column][/vc_row][vc_row][vc_column][vc_separator color=”turquoise” style=”dotted” border_width=”5″][/vc_column][/vc_row][vc_row][vc_column][vc_column_text]
2. Boo Boo First Aid Salve
I’m going to need something for minor boo-boos (cuts, scrapes, & minor burns). This healing salve has antibiotic qualities that will replace Neosporin which contains petroleum I want to avoid because it’s been linked to cancer.
Thankfully, there are safe and effective alternatives to Neosporin… And here’s a recipe to make your own:
To make your own Healing Neosporin Salve:
1 Cup coconut oil 1/8 cup beeswax pastilles 10 drops Lavender essential oil 1 TBS Raw Honey 1 TBS dried Calendula Flowers 1 TSP dried Comfrey Leaves 1 TSP dried Rosemary leaf 1 TSP dried Chamomile
You can also add other essential oils if you want. Mix the ingredients and keep them in a jar small enough to fit in your first aid kit.
If you don’t have the time or energy to make your healing salve, here’s one that I highly recommend and use. – Suture Healing Ointment
[/vc_column_text][/vc_column][vc_column][/vc_column][/vc_row][vc_row][vc_column][vc_separator color=”turquoise” style=”dotted” border_width=”5″][/vc_column][/vc_row][vc_row][vc_column][vc_column_text]
3. Witch Hazel
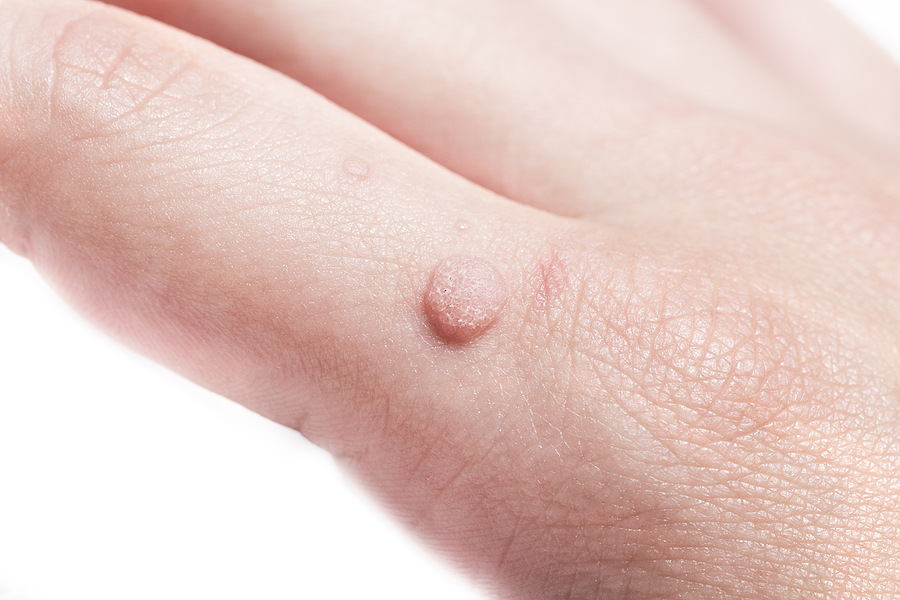
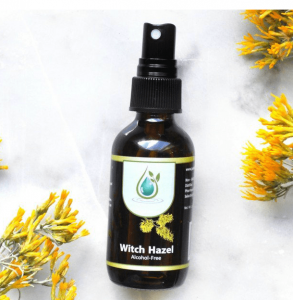 Witch Hazel is one of my favorite versatile remedies! It’s an astringent herb that is great for treating inflammation or swelling. If anyone gets poison ivy, sunburn, bug bites, cuts, or scrapes, witch hazel can help. Some over-the-counter brands contain alcohol, so it may sting a little when applied, but it can promote more rapid healing and I can use it to stop any minor bleeding from small grazes and cuts.
Believe it or not, witch hazel is great for those aches and pains you might get from long, arduous hikes!
If you get a bad muscle cramp, poison ivy, bruises, sunburn, bug bites, cuts, or scrapes, it can help to repair and reduce discomfort.
You can add a few drops of soothing essential oils like rosemary and chamomile to infuse Witch Hazel. I’m going to add a few drops of chamomile to mine.
[/vc_column_text][/vc_column][/vc_row][vc_row][vc_column][vc_separator color=”turquoise” style=”dotted” border_width=”5″][/vc_column][/vc_row][vc_row][vc_column][vc_column_text]
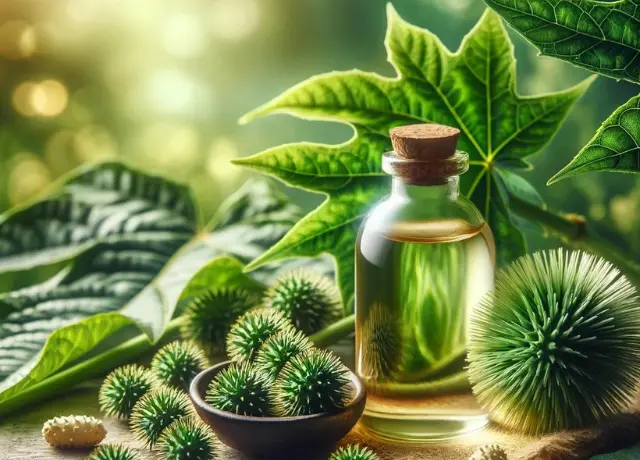
4. Activated Charcoal
The next natural item I’m putting in my first aid kit is Activated Charcoal Powder. This isn’t the type of charcoal you use in your gas grill, but a special powdered form of charcoal. Activated Charcoal is a trend in the holistic and natural health world, as people discover how many health benefits it has.
If someone gets bad nausea while on the trip or worse, experiences food poisoning, I’ll be glad to have it.
Here are some different ways to use activated charcoal:
To ease stomach pain and indigestion Help treat food poisoning Find relief for diarrhea Reduce toxins in the body Apply it to burns or scrapes on the skin Cure intestinal illness
Activated charcoal is not known to be toxic, but care should be taken to find a high-quality form. This article has a full list of precautions.
I like this brand of Activated charcoal because it’s made from coconut shells and is the purest source I’ve found. I’ll store it in a small glass or plastic jar for travel.
[/vc_column_text][/vc_column][/vc_row][vc_row][vc_column][vc_separator color=”turquoise” style=”dotted” border_width=”5″][/vc_column][/vc_row][vc_row][vc_column][vc_column_text]
5. Arnica
Arnica is a type of plant that grows in Europe and the United States. The leaves and flowers are used as healing herbs for many different ailments.
If you can find an arnica topical cream, this is a good thing to bring with you in your natural first aid kit. The topical creams help with pain from bruises, heal wounds and relieve pain from injuries to the joints, tendons, or muscles.
It should not be used internally or with open wounds. You can also find arnica in an essential oil, but again, don’t use for any of your cuts, gashes, or scrapes.
[/vc_column_text][/vc_column][/vc_row][vc_row][vc_column][vc_separator color=”turquoise” style=”dotted” border_width=”5″][/vc_column][/vc_row][vc_row][vc_column][vc_column_text]
6. Bach Rescue Remedy
 Rescue Remedy is the most famous of the Bach remedies created to deal with stressful situations. It’s designed to give support for times of stress and nerves.
I always carry a bottle in my carry-on when I travel because I tend to feel anxious when I fly. But for first aid, you can place a few drops directly on a cut, burn, or bruise for speedy healing.
[/vc_column_text][/vc_column][/vc_row][vc_row][vc_column][vc_separator color=”turquoise” style=”dotted” border_width=”5″][/vc_column][/vc_row][vc_row][vc_column][vc_column_text]
7. Ginger
People tend to get indigestion when they travel. Ginger is one of the best natural remedies for nausea and indigestion. It can also help with menstrual cramps and gas.
I like to keep ginger Tummy Drops in my travel first-aid kit because they are super convenient. I’ll also, add a few ginger tea bags so you can make a cup of warm, spicy ginger tea. It will help calm a stomach ache, ease headaches, and relieve other aches and pains as a result of a virus
[/vc_column_text][/vc_column][/vc_row][vc_row][vc_column][vc_separator color=”turquoise” style=”dotted” border_width=”5″][/vc_column][/vc_row][vc_row][vc_column][vc_column_text]
8. Essential Oils
Essential oils are extracted from the leaves, stems, and flowers of healing plants. Each oil contains its own set of health benefits.
Here are some essential oils to consider in your first aid kit, particularly if you will be enjoying outdoor activities in the summertime.
[/vc_column_text][/vc_column][/vc_row][vc_row][vc_column][vc_separator color=”turquoise” style=”dotted” border_width=”5″][/vc_column][/vc_row][vc_row][vc_column][vc_column_text]
Lavender Essential Oil
The most important oil to have in your first aid kit. It’s antiviral, antibacterial, anti-itch, and good for healing minor burns, scrapes, cuts, and bumps.
[/vc_column_text][/vc_column][/vc_row][vc_row][vc_column][vc_separator color=”turquoise” style=”dotted” border_width=”5″][/vc_column][/vc_row][vc_row][vc_column][vc_column_text]
Tea Tree Essential Oil
Australians consider Tea Tree oil to be “first aid in a bottle”. It’s used to prevent and treat many types of infections. You can use it on rashes, scrapes, blisters, and bruises.
[/vc_column_text][/vc_column][/vc_row][vc_row][vc_column][vc_separator color=”turquoise” style=”dotted” border_width=”5″][/vc_column][/vc_row][vc_row][vc_column][vc_column_text]
Peppermint Essential Oil
Use peppermint for headaches, motion sickness, congestion, upset stomach, sunburn, poison ivy, and other itches.
[/vc_column_text][/vc_column][/vc_row][vc_row][vc_column][vc_separator color=”turquoise” style=”dotted” border_width=”5″][/vc_column][/vc_row][vc_row][vc_column][vc_column_text]
Chamomile Essential Oil
For sore muscles, muscle spasms, and relaxation (blend with lavender for the most relaxing bath around). I’m going to need this one after the kiddos are tucked in bed!
[/vc_column_text][/vc_column][/vc_row][vc_row][vc_column][vc_separator color=”turquoise” style=”dotted” border_width=”5″][/vc_column][/vc_row][vc_row][vc_column][vc_column_text]
Include a Carrier Oil
After you have chosen the essential oils you want to bring with you, don’t forget a carrier oil. Carrier oils allow you to dilute the pure essential oil so that it doesn’t burn or irritate your skin. Always dilute essential oils because they can cause different effects when applied directly to the skin.
I’m choosing Jojoba oil because it’s high in Vitamin E which is highly nourishing along with being anti-inflammatory and anti-fungal
Some other good carrier oils to choose from are: Jojoba oil Grapeseed oil Sweet almond oil Coconut oil Argan oil
[/vc_column_text][/vc_column][/vc_row][vc_row][vc_column][vc_separator color=”turquoise” style=”dotted” border_width=”5″][/vc_column][/vc_row][vc_row][vc_column][vc_column_text]
9. Peroxide and Epsom Salt
Peroxide and Epsom salt are good to use for a variety of purposes without having added chemicals or preservatives in them.
Hydrogen Peroxide
Be sure you have at least a small bottle of hydrogen peroxide in your first aid kit. This can be used for so many things but is particularly useful for cleaning out wounds.
While other items on this list help provide relief and help wounds heal, you still need to clean it out if it has dirt and other bacteria in it. It does sting at first, but that goes away quickly. You can also use it if you show signs of infection, like with an ear infection.
Epsom Salts
Also, be sure you have a small container or jar of Epsom salts in your natural first aid kit. You can add them to your bath if you have sore and tired muscles after a hike, or help with a migraine headache.
Epsom salts are also really good for removing splinters. Add some salt to a bowl of water, then let the hand or foot with the splinter rest in the salt water. After soaking for a few minutes, remove it and the splinter should come out easily.
[/vc_column_text][/vc_column][/vc_row][vc_row][vc_column][vc_separator color=”turquoise” style=”dotted” border_width=”5″][/vc_column][/vc_row][vc_row][vc_column][vc_column_text]
10. Apple Cider Vinegar
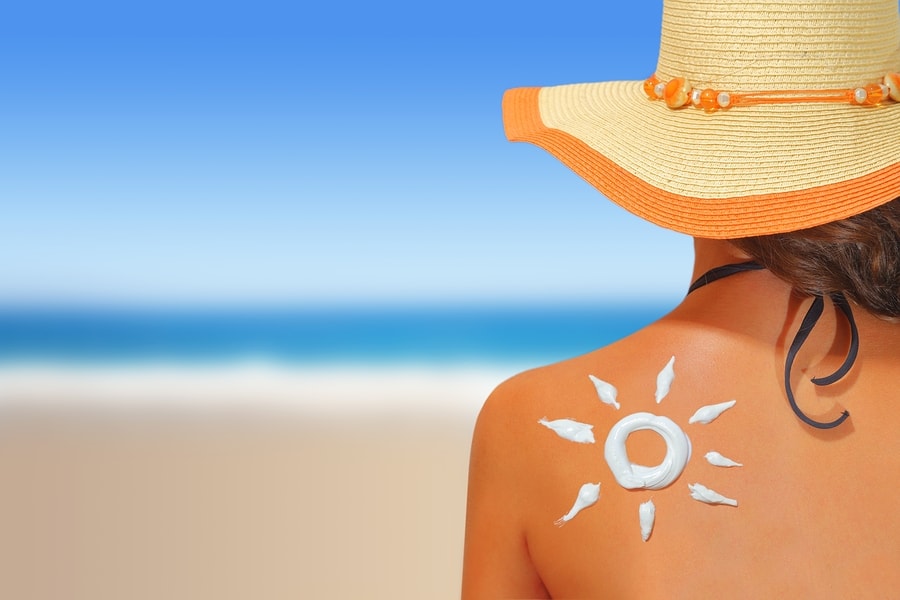
Apple cider vinegar is the best remedy I’ve found for sunburn pain.
You’ll want to dilute it instead of applying directly to the burn. Mix 2 parts water to 1 part Apple Cider Vinegar in a spray bottle, then spray it on your burn.
You can also add some lavender essential oils to the mixture. If you are using it at home, try adding it to a lukewarm bath with the essential oils for full-body relief.
ACV Can Relieve Bug Bites
Finally, apple cider vinegar can help with bug bites. Insects are everywhere, but even more so in wooded areas in the hot summer sun. If you’re planning a backpacking, hiking, or camping trip, apple cider vinegar can help with the burn or sting from insect bites.
[/vc_column_text][/vc_column][/vc_row][vc_row][vc_column][vc_separator color=”turquoise” style=”dotted” border_width=”5″][/vc_column][/vc_row][vc_row][vc_column][vc_column_text]
11. Bug Spray Repellent
I’m going to need a powerful bug spray and ways to treat bug bites! Michigan’s Upper Peninsula is paradise, but between the months of April and October, a plague of blood-sucking insects descends and can ruin a perfectly beautiful summer day!
I wanted a bug spray minus the DEET (N,N-diethyl- meta-toluamide) used in most over-the-counter brands because it’s been shown to harm the brain and nervous system function… Especially little ones are at risk! So, there are better options that have been shown to be just as, or even more effective, without the harsh side-effects. This is the one I’m using.
Also, Dr. David Williams reports in his Alternatives For the Health Conscious Individual, July 2017 newsletter, that the essential oil in catnip called nepetalactone is 10 times more effective than DEET at repelling mosquitoes.
You can buy nepetalactone at most major health food stores, some pet stores, or online. Unfortunately, it is somewhat expensive.[/vc_column_text][/vc_column][/vc_row][vc_row][vc_column][vc_column_text]
12. Bentonite Clay
 Bentonite clay should be in every natural first aid kit. It comes from volcanic ash and is rich in trace minerals, including magnesium, potassium, and calcium. It’s very effective for drawing toxins from insect bites out.
I have Hydrated Redmond Clay in my natural first aid kit for bug bites. Just mix with a bit of water and warm olive oil and put a big blob on the bite. Then cover with a thin piece of clean gauze and let the clay help draw out the toxin for at least an hour.
[/vc_column_text][/vc_column][/vc_row][vc_row][vc_column][vc_separator color=”turquoise” style=”dotted” border_width=”5″][/vc_column][/vc_row][vc_row][vc_column][vc_column_text]
13. Other Tools & Essentials
Finally, I’ll add more traditional first-aid items to my natural first-aid kit. These are going to be the various tools and accessories to wrap, cover wounds, and provide basic first aid while indoors or outdoors.
Miscellaneous Tools for a First-Aid Kit
Whether you are attaching a bandage, removing a splinter, or cutting a piece of gauze for a wound, you will need these little tools.
This includes items like:
- Scissors
- Tweezers
- Safety pins
- Thermometer
- Flashlight
- Mouthpiece for CPR
[/vc_column_text][/vc_column][/vc_row][vc_row][vc_column][vc_column_text]
Gauze, Bandages, Wraps & Wipes
The next category of essential items for a natural first aid kit includes the bandages and gauze. The gauze is going to help stop the bleeding and keep an infection from entering the wound. The bandages help cover up cuts and scrapes.
If someone gets a sprained ankle, broken toe, or aching joint, you might need some wraps. You should have a few different sizes depending on the part of the body you need to wrap, along with bandage clips or adhesive tape to hold it securely.
- Gauze
- Ace bandages
- Band-Aids
- Alcohol wipes
[/vc_column_text][/vc_column][/vc_row][vc_row][vc_column][vc_column_text][/vc_column_text][/vc_column][/vc_row][vc_row][vc_column][vc_column_text]
Some other important items to include in the first aid kit are:
- Ice packs
- Batteries
- Non-latex gloves
- You may also want to consider an over-the-counter pain relief medication.[/vc_column_text][/vc_column][/vc_row][vc_row][vc_column][vc_separator color=”turquoise” style=”dotted” border_width=”5″][/vc_column][/vc_row][vc_row][vc_column][vc_column_text]
[/vc_column_text][/vc_column][/vc_row][vc_row][vc_column][vc_column_text]
[/vc_column_text][/vc_column][/vc_row][vc_row][vc_column][vc_column_text]
Put it All Together
Now that you know what to put in your natural first aid kit, it is time to put it together. It is good to keep all of these items in the same container or bag so that you can find them easily.
Here are some options:
Large Plastic Storage Bag
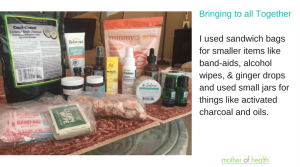
This is a really simple and inexpensive way to pack your first aid kit. If you have a smaller kit with just a handful of items, just one of the larger quart-size plastic bags will work just fine. Little containers of oils or herbs don’t take up a lot of space, and items like gauze and scissors can easily fit in the bag.
If you are planning on a more complex first aid kit, you might want to grab an extra storage bag. One bag can include your different balms, creams, tinctures, herbs, and essential oils. Then in the other bag, go ahead and fill it with the basics like gauze, bandages, wrap, tweezers, scissors, and medications. This keeps it organized and allows you to easily find what you need even in an emergency.
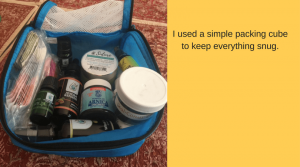
Cosmetic Case for Storage
Another option for storing your first aid kit is to put all the items in a cosmetic case. This gives you many options, based on the type of case you get. Smaller cosmetic cases might just have one large compartment if you only have a few items in your kit.
Then there are larger sizes with multiple compartments, making it easier for you to organize everything. If it has at least a few pockets in it, you can use those for your tweezers and scissors, keeping them away from the other items.
Finally, there are travel cosmetic bags, which open up or roll up, and have tons of zipper pockets and various compartments. This is really ideal because when folded up, it won’t take a lot of space in your backpack, but also has plenty of room for everything you want to bring.
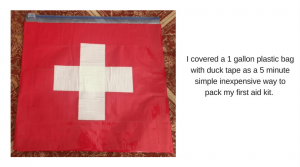
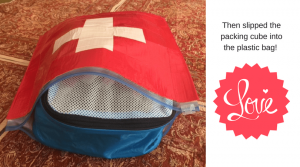
First Aid Container
You can also use a regular first aid container or box, but switch out some of the items you keep inside. There are stores selling empty and full first aid containers with the classic red and white X on the front. This will make it easy for you to find it in your luggage or backpack in an emergency. If you get one ready-to-go, replace some of the medical items with your natural health items, and you’re good.
[/vc_column_text][/vc_column][/vc_row][vc_row][vc_column][vc_column_text]
[/vc_column_text][/vc_column][/vc_row][vc_row][vc_column][vc_column_text]
[/vc_column_text][/vc_column][/vc_row][vc_row][vc_column][vc_column_text]
[/vc_column_text][/vc_column][/vc_row][vc_row][vc_column][vc_separator color=”turquoise” style=”dotted” border_width=”5″][/vc_column][/vc_row][vc_row][vc_column][vc_column_text] [/vc_column_text][/vc_column][/vc_row][vc_row][vc_column][vc_column_text]Spending time in remote places requires preperation. But, now I’m ready to have a fun, healthy, and safe trip! I hope this gave you some ideas to build your own first aid kit to meet your specific needs.[/vc_column_text][/vc_column][/vc_row][vc_row][vc_column][vc_column_text]

[/vc_column_text][/vc_column][/vc_row][vc_row][vc_column][vc_separator color=”turquoise” style=”dotted” border_width=”5″][/vc_column][/vc_row][vc_row][vc_column][vc_column_text] [/vc_column_text][/vc_column][/vc_row]