Preserving and storing food is an essential skill and lost art that is coming around again. More and more people want to preserve locally grown seasonal food so they can eat healthy all year long. If you know how to preserve fruits and vegetables you can put them up and eat healthy all year.
Preserving fruits and vegetables helps you to control what's in your food. Plus, you will save money and create a pantry should you ever need an emergency food stock. Knowing how to preserve fruits and vegetables will also serve you when:
- You find a great deal at your grocery store or farmer's market
- When you're offered a deal on a bushel of produce that you cannot say no to
- When you have a bumper crop of squash, tomatoes or green beans
5 Ways To Preserve Fruits and Vegetables
#1. Freeze It
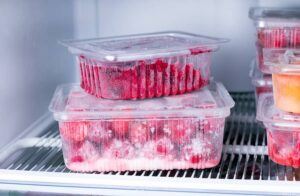
Freezing fresh fruits and vegetables is one of the easiest ways of preserving food, so it's a great place to begin.
Always begin by washing your produce and then carefully dry with a clean towel. If you want, you can chop up and core larger vegetables to make it easier to store and use.
Freezing is a great way to preserve fruits like berries and peaches that have a short life once they ripen.
You can freeze some vegetables raw, but most of them will have better color and texture if you blanch them before freezing them. Just make sure to give them a quick ice bath after blanching to cool and stop the cooking process.
Next, line a sheet pan with parchment paper and freeze your fruit or vegetables in a single layer. Once they are fully frozen, place them in a freezer bag. Now you'll want to label and date each one before you store them in the freezer.
The only disadvantage of freezing is that you may be a bit limited by the amount of room in your freezer. Also, you may consider what you'll do should in the event of a long-term power outage. If you have a chest freezer, it can keep foods for up to four days if kept closed.
Be sure to label whatever you freeze. This way, you'll know what it is and how long you've been storing it in the freezer.
#2 Dehydrate It
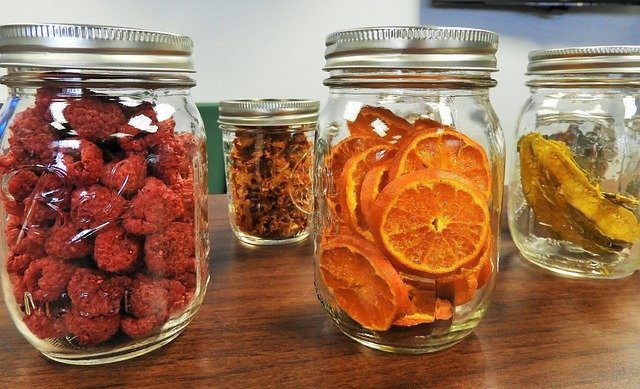
The beautiful thing about dehydrating or drying food is that it takes up little space. You really only need your oven set on the lowest setting to successfully dehydrate.
Don't misunderstand, food dehydrators have some great perks. First off, they speed up the process of drying food considerably. Fast-drying means that bacteria has less time to grow. It also means that some foods keep their color better.
Step 1 – Inspect Your Produce
Look over your fruit or vegetable to make sure they do not have any mushy, soft spots. You also want to avoid hard, green underripe fruit as well. The food doesn't need to be perfect; it just needs to be free of decay and be ripe.
Step 2 – Wash and Blanch
Wash and pat dry your produce on the same day you get it.
To blanch, bring a large pot of water to boil.
Next, fill another large pot or bowl with ice water. You'll need a steam basket or slotted spoon to get the produce out of the water quickly.
To blanch, quickly dip the food into the boiling water, and then plunge it in cold water to halt cooking. Blanch vegetables for 3-5 minutes. Blanch fruits for 2-3 minutes.
Do not skip the blanching for the best results. It will make a difference in the quality and shelf life of the foods because blanching kills bacteria that causes decay.
Try dehydrating some apple slices, or any food you use in baking throughout the year. Then explore further and come up with fun snacks like kale chips, banana chips, and even dried veggies that you can use in soup.
Step 3 – Pat Dry
After blanching, place put your produce on a sheet pan covered with several layers of paper towel. Pat dry.
Step 4 – Slice and Chop Food
Chop or slice fruits like bananas, strawberries, pineapples into even slices. Take corn kernels off the cob and remove pits from stone fruits.
Step 5 – Place Food in Dehydrator
Turn the dehydrator to the setting recommended. Then place your slices on the trays with even spaces between the pieces with no overlapping.
If You Do Not Have a Dehydrator
You can make a DIY dehydrator by using old window screens. Just make sure they are lead-free.
You can also make a screen by stapling screen material to a plain wood frame. Cover with cloth, place food together, but not touching. Now cover with another cloth and place outside in a dry, shady area. Don't forget to bring it in at night. Do this for 2-3 days or until dry.
#3. Can It
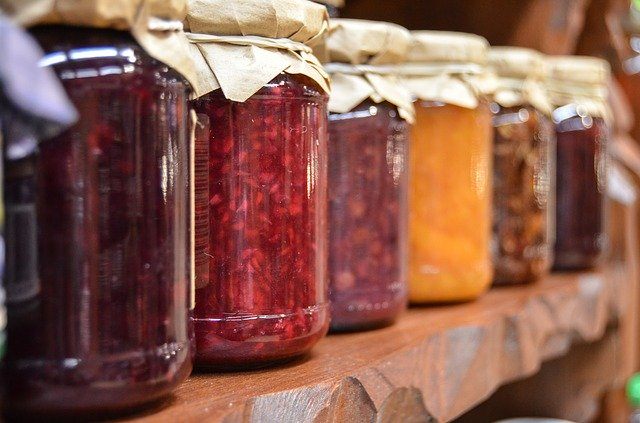
One of the most flexible ways to preserve food is to can it. Canned food stores longer than any other method, so it opens the door to so many recipe possibilities. You can preserve anything from green beans to pie filling. The advantage of canning is that it doesn't take up space in your freezer.
You can store your canned goods in your prepper's pantry or your kitchen cupboards, or really anywhere you have space.
Canning Tools and Equipment
Here's a list of essential tools and equipment you will want to have on hand.
- Large pot with a tight-fitting lid – for water bath canning
- Steam canner
- Clean jars, lids, and rings
- Headspace measuring and air bubble remover tool
- Widemouth funnel
- Nonreactive spatula
- Magnetic lid grabber
- Large slotted spoon
- Heatproof, water-resistant canning mitts
- Clean terrycloth kitchen cloths
- Distilled white vinegar
- Timer
- Permanent marker
Two Methods for Canning Foods
There are two methods recommended for canning food.
1. Boiling water bath
2. Steam pressure canning
Water Bath
Water bath canning is needed for preserving high acid foods (most fruits) with a pH of 4.6 or less. The theory is that acid helps to preserve the foods at about 212 degrees (boiling water) to destroy bacteria, mold and yeasts.
Water bath canning works well for:
- Cherries
- Peaches
- Pears
- Applesauce
- Plums
- Mangos
- Nectarines
- Apricots
- Tomatoes
- Pickles
- Radishes
- Zucchini
- Berries
Dehydrating will give your foods a shelf-life of approximately one year. It preserves by heating to 212 degrees Fahrenheit to destroy bacteria, mold, and yeasts.
Instructions for Water Bath Canning

Step 1 – Sanitize
Sanitize by washing canning jars, lids, and bands in hot soapy water. Rinse and dry thoroughly.
Step 2 – Fill Pot with Water
Fill a large pot of water with enough water to cover your jars. Place jars in the pot. Bring the water to simmer (180 degrees F) for at least 10 minutes. This will prevent the jars from breaking when filled.
For this step, you can also wash and dry the jars in the dishwasher. Just keep the door closed to keep them warm until needed.
Step 3 – Prepare lids and bands
Prepare the lids and bands. Lids must be simmered for 10 minutes to get a good vacuum seal. Simmering them helps to activate the sealer to get the best seal. Keep the lids in the simmering water until you're ready to use them. (Do not boil the lids in water hotter than 180 F because it may interfere with proper sealing).
Step 4 – Fill the jars
Now you are ready to fill the jars. Leave 1/2 inch at the top of the jar.
Step 5 – Release air bubbles
Glide a non-reactive (rubber) spatula around the inside of the jars to free any air bubbles.
Step 6 – Wipe Rims
Wipe and dry the rim of the jar to make sure you get a good seal.
Step 7 – Lids and Bands
Now put the lids and bands on the filled jars. Tighten just until you feel resistance. Don't force or overdo it.
Step 8 – Process in water
Fit your large pot with a metal rack to prevent the jars from breaking. Fill pot to about half with water. Bring to a full simmer. Place the filled jars into the simmering water using a jar lifter. The water level should be one to two inches above the jars. Bring to a boil. Cover the pot. Check your recipe for specific processing times – typically between 10-15 minutes. Let cool for 15 minutes before removing the jars from the water.
Step 9 – Cool down
Let jars cool on a towel or cutting board for 12-24 hours. Leave approximately 2″ of space between jars for cooling.
Step 10 – Check the Seal
Press down on the center of the lid with your index finger to check the seal. If it does not pop up, you're good to go and have a good seal. If the lid pops up, you didn't get a good seal, and these jars should be refrigerated or frozen.
Pressure Canning

Non or low-acidic vegetables, poultry, fish, and vegetable stock need a pressure canner (as opposed to water bath canning) to safely preserve the food. Pressure canning traps heat inside the pot and heats to 240 or beyond, which is needed to destroy pathogens.
Pressure canning works well for:
- Corn
- Carrots
- Green beans
- Dry beans
- Peas
- Tomatoes and tomato sauces
- Blueberries
- Strawberries
- Squash
- Potatoes
- Jalapenos
- Grapes
- Peaches
- Lemons
- Onions
- Garlic
- Chicken stock
- Meats and bone broth
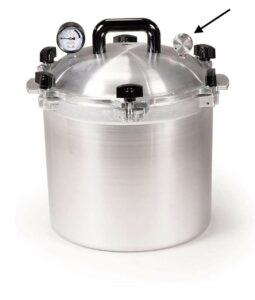
There are at least three different kinds of pressure canners available to buy.
- Dial gauge canner – Dial pressure gage on the lid to let you know when the pressure has reached the appropriate level.
- Weighted gauge canner – No gage on this canner. It uses weighted regulators to determine pressure.
- Combo gauge canner – These canners have a dial gauge as well as a weighted regulator
I've spent some time researching which is best, and I can tell you it's a matter of opinion. But after reading way to many reviews, I can report that the All-American canner on Amazon gets the most rave reviews. This holds true not only on Amazon but across other social media (Facebook) platforms as well, so it's the canner I decided to go with. It's not the cheapest, but it's considered the best.
Instructions for Pressure Canning
Step 1
Unlike water bath canning, there is no need to sterilize the jars first. Just make sure the jars are clean and hot, which you can do by letting them sit in a sink of hot water or run them through the dishwasher. Getting the jars hot will prevent them from breaking or cracking.
Step 2
Fill the canner with 3-4 inches of water. Place on the burner. You can damage the canner if you run out of water in the canning process, so don't let that happen. Unlike the water bath method, the jars do not need to be completely covered with water.
Step 3
Place the canner rack down inside the canner. Place the filled jars on top. If you are using smaller jars, you can stack them with another rack between the two layers.
Step 4
The All-American (I love that it's made in Wisconsin!) has six wing nuts that you will need to tighten to get a good seal. Always tighten opposite wing nuts at the same time. (Every brand will be a little different, so read the directions if you are using another brand).
Step 5
Turn the burner on high and make sure the weighted gauge on the lid is off at this point.
Step 6
Set Your Timer. Once the pressure vent begins to release steam, set the timer for 10 minutes. Allow it to sputter and hiss (exhaust) for a full 10 minutes.
Step 7
Follow Your Canning Recipe by checking to see how many pounds of pressure you'll need. The three settings on the weighted gauge are 5, 10, and 15 pounds. Also, look to see how long you'll need to process whatever your canning. Vegetables will require less time than meats.
Step 8
When the venting time is complete, now is the time to place the weighted gauge over the top of the pressure vent on the top lid.
Step 9
Let the pressure build inside the canner. Once the canner reachers the right pressure, the weighted gage will begin to rattle around 1-4 times per minute. This lets you know the pressure is staying at the proper level. If it continually rattles, this tells you the pressure inside is too high, so reduce the heat. (Not enough rattles, increase the heat.)
Step 10
Turn off the heat and allow it to cool in place. Do not move the canner till completely cooled. Once the gauge reads zero, remove the weighted gauge and lid. Be careful not to burn your hands or face from the steam. Remove the jars of food and allow them to cool. Check the seals just like with the water bath canning. You should hear them “pop” to let you know they are good to go.
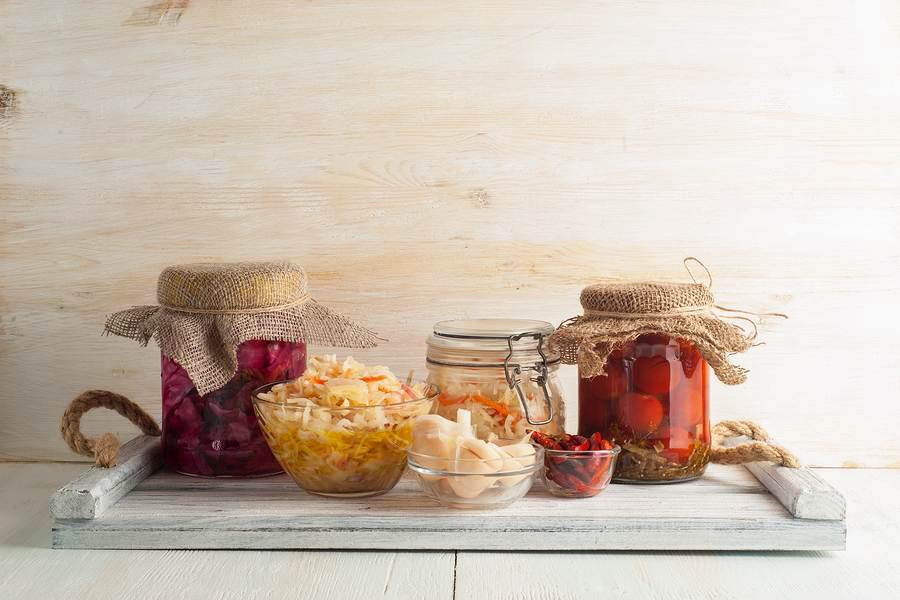
4. Pickle It
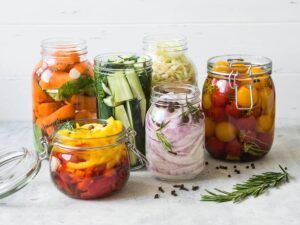
One of my favorite ways to preserve foods is to pickle them. Pickled foods make such a great addition to salads and sandwiches all year long!
5. Fermenting
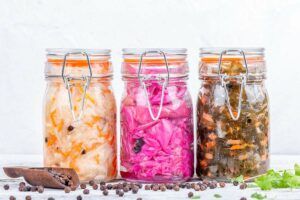
Last but not least, let’s talk about fermentation. Fermentation may seem popular these days, but it is not a fad. This is another process of preserving food that has been around for a long time. It has been used by people from all over the world to create drinks, breads, dairy foods, and to preserve vegetables.
As we're learning more and more about nutrition and food as medicine, fermenting has experienced popularity.
And if you think about it, there are plenty of fermented foods that have been on our market shelves for years. This includes pickles, kefir, sauerkraut, and sourdough bread.
So, if you have the idea that fermented foods are good for you, here are some tips.
Start with a Kit
If you are new to fermenting, you may want to begin with a kit for several reasons. First off, kits will have everything you need to ferment your chosen food. The kits will also introduce you to the different aspects and amounts used in the fermentation process.
The second reason it is wise to begin with a kit is that it's often less expensive than trying to buy everything you will need for the fermentation process. You'll also get step-by-step instructions, and often coupons for another purchase, as well as recipes to try.
Stick with Foods You Already Like
You may already love certain fermented foods like pickles or yogurt. If so, then stick with fermenting those foods you like. The good thing is that you already know and enjoy these textures and flavors. If you try a recipe for something you are unsure of, then you may not know if the result is what you wanted or not.
Have a Storage Plan
Make sure you have a place to store your fermented foods, as well as for how long you will store them before they are ready to eat. The last thing you want to to have the foods ready to go and discover you don't have enough space to support the fermenting process. Do some research on the best ways to store your fermented foods and the temperatures you will need to maintain.
Conclusion
So there you have it… five excellent ways to preserve fruits and vegetables. If you are new to preserving your foods, start small and with foods you already like to eat. Trust that you will naturally gravitate toward the method best for you. And, maybe in time you'll use them all.
Don't forget to follow us on Pinterest. Thank you for your time and reading and please share with your friends if you found this helpful or useful.

High fiber foods help to fill you up. Protein will keep you feeling full longer. Cinnamon helps to even out how your body absorbs the sugars in foods so you don’t get hungry as often.